To make internal female threads, you can form tap, cut-tap, boring bar lathe thread, or mill tap. Form tapping rolls the threads, and is a chip-less cold-forming process. It produces a stronger thread than a cut-type. The bar/mill tap tools can be used on many sizes of thread internally and externally. The boring bar is more limited on the depth and diameter it can cut to, however, since it only cuts on one side. The rigid forming tap can thread a bit deeper and straighter. Tapered and finish taps don’t last long. One job can easily wear out the tap, so have several on-hand. Generally, they cannot be refinished like a reamer so they are scrapped. Boring bars are utilized fixed with a lathe turning the workpiece, and the mill tap is turned on a mill with the workpiece held stationary. Otherwise, the process is similar.
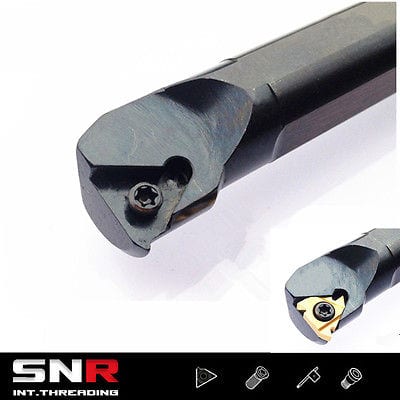
Lathe boring bar with threading insert. Note the 60 deg. angles on the carbide tip thread cutter.
Below, a thread mill cutter.
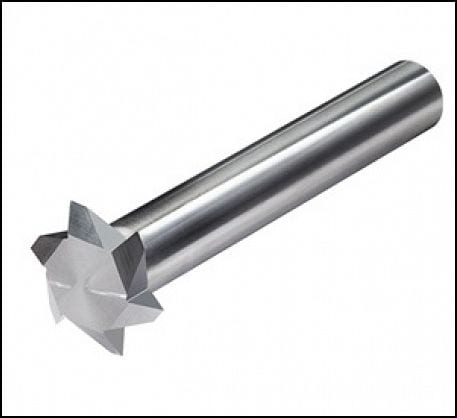
Thread mill for internal threads.
Quantity manufacturing preferably uses form tapping. With gunsmithing, where most folks just do one-off jobs, the easiest home method is the cutting tap. However, it requires you to possess at lease one tap of each practical size and a matching drill. There are numerous thread tap drill size determining programs on the internet. Pick one that works for you. The most critical part of a tap process is the initial size of the pre-drilled hole. Too small and the tap will seize, too large and the thread will be loose, that is, not fully engage. For example, since no material is removed with form taps, the pre-drilled hole can be larger in size than that used for cutting taps. Choose wisely.
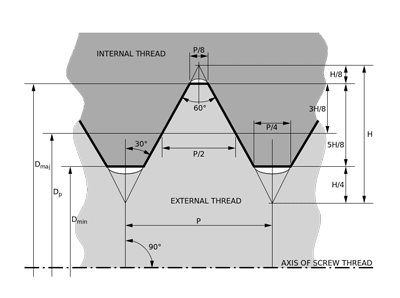
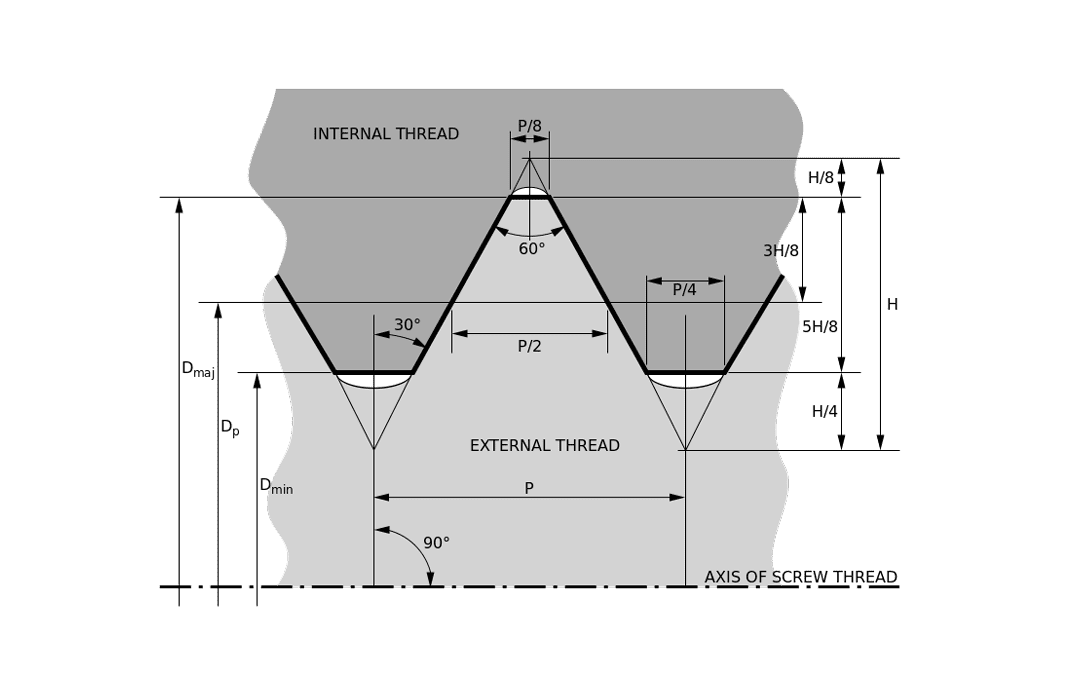
Note the verbage used for an internal thread: From the diagram, p is Pitch Diameter, and P is pitch. For a single thread screw, pitch and lead are the same. [You see multiple thread screws for example, on the neck of a pickle jar. These are not used in gunsmithing.]
Not shown on this diagram is nominal diameter. Think of the word nominal as “named,” or what you call the thread. 3/8, 1/8, ¼, 10, 8, etc. It is roughly the major diameter of the thread, but sometimes the thread points are trimmed or crowned flat. Screws with a plain shank portion near the head will have that portion at the nominal diameter. It is not the pitch diameter Dp.
A forming tap looks like a polished and hardened threaded stud, with some shallow flutes for the oil. It uses a faster speed than a boring bar. Due to the high pressure of cold forming, it is doubtful that gun manufacturers use them much on the delicate light weight internal threads of firearms. Benefit: it will not make chips.
Cut-tapping requires at least 2 types of tap, a bottoming tap that is threaded fully to the tip, used to finish a blind hole with functional threads deep into the hole, and a plug or taper tap, which starts the tapping process and is used for both the initial tap on a blind hole, or all the way through on a through-hole. They come in sets of 3 but you can use two only on a blind hole, or one plug or taper on any through hole.
Be sure the taps are of a material harder than your workpiece. Carbon steel is only good on aluminum, wood, and brass. Steel pieces require HSS or carbide taps, and well worth the price.
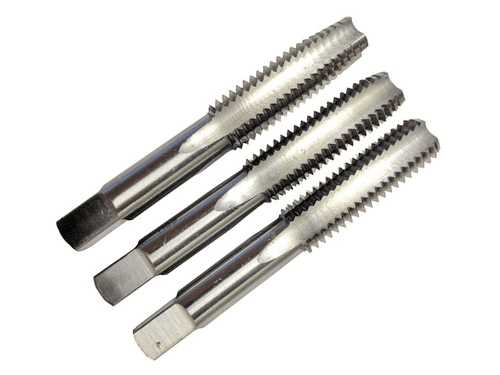
L to R: Plug, tapered, and bottoming taps in a set.
When tapping, all processes use a cutting oil to lubricate the process. Some high volume machining centers use a water-based coolant, but lubrication is the key. There are a number of “high pressure” cutting oils available, and they will be labeled as such. Use as much as you need, don’t skimp, and don’t try to use a motor oil or gun oil.
If you have a drill press or mill available to you, but plan on hand-tapping the hole, employ the machine to hold the tap immediately after drilling the hole. This will keep the tap aligned with the hole, and provide good down-pressure using the machine arbor (without the machine turning, please!). This tap should have a tap handle on it, which you manually turn into the workpiece, around and under the arbor, then back out to remove the chips, add more lube, and repeat, all while keeping it under vertical pressure using the machine arbor handle. It works pretty slick. Chips must be removed from the bottoms of blind holes frequently during this process, but be careful to wear safety glasses and with using compressed air, or you could get them in the face.
No matter how you approach this process, do so carefully and precisely, please. It will make a big difference in how well the screw seats and holds in the gun, and can reduce the chances of cross-threading. If the screw is bent, throw it out. Never try to straighten out a bent or damaged screw. If it breaks in the hole you just have more problems.
Don’t use heli-coil on a gun. Salvage a cross-threaded hole with oversizing and re-tapping, or try to form-tap it, but never re-use a cross-threaded screw. They are too readily replaceable and inexpensive to risk ruining your once-in-a-lifetime big game hunt on. Seriously. Even if the screw head is engraved, just find an engraver and have it re-done on a new screw head. If it’s really that bad, bore it out and plug it with a collar and tap the plug with a fresh thread. A good gunsmith can do this.
Finally, be careful where you use Loctite on threads. There is green, purple, blue and red Loctite. The red holds forever; never use red Loctite on anything you don’t want permanently attached. It takes heat applied to break the bond. Maybe. Green is better. Typically, thread sealant is applied to “permanently” installed screws, never something that should be re-adjusted or taken down periodically. It is NEVER used on the barrel ends and rarely if ever, on scope mounts. Being discriminating makes the difference in how many cuss-words will be used tomorrow getting the screw back out.
